How to Speedsolve the Rubik's Cube
Speedsolving the Rubik's Cube | Intro
The most popular Speedsolving method is the CFOP (Cross, First 2 layers, Orientation of last layer, Permutation of last layer) a.k.a Fridrich Method. Unlike The beginner's method, the Speedsolving method focuses mainly about solving the Rubik's cube in the fastest and most efficient way, rather than the easiest way.
The CFOP method average number of moves for a complete solution is ~56 moves.
While using the beginner's method, the average number of moves is roughly around 110 moves. (100% more moves!)
All top ranking speedcubers today use the CFOP method (sometimes with additional variations to it). Mastering the speedsolving method requires learning some new algorithms and practice, and takes a bit longer than the beginner's method. However since fully mastered it will enable you to speedsolve the Rubik's cube much faster, and basically from there only practice is what stands between you and sub 30/20/10 solving time, and the world record!
Note: It is advised to start learning the speedsolving method only after successfully solving the Rubik's cube and mastering the beginner's method. Speedsolving is all about time, so it best to be able to solve the Rubik's cube within 1:30-2:00 minutes before start learning it. Before that it might just be too soon. Read my beginners solving tips on how to get faster, as they review the basic principle that relevant for every speed-cuber. The Fridrich method consists of 4 steps only:
- Cross: Solving the first layer 4 edge pieces completely. (what looks like a cross shape)
- F2L: Solving the first two layers completely (not hard as it sound:) )
- OLL (Orientation of Last Layer): Correctly orienting the last layer corner & edge pieces.
- PLL (Permutation if Last Layer): Correctly permuting the last layer corner & edge pieces.
Last and not least, quickly read again my Rubik's cube solution intro part to make sure you are on the same page for the mechanical stuff of the cube like what edge, corner and center pieces are, and move notations, et cetera. It is important to know the full move notations for speedsolving (middle layer turns, double layer turns & cube rotations) check my guide here- Move Notations Page.
The Solution
The Cross
Solving the cross is the first step of the CFOP, it consists of solving the 4 edge pieces of the first layer you choose to start with. After solving them correctly they will form a shape of "cross". This step is exactly the same as the first step of the beginner's method, so you should already know how to do it, however with one difference: Solving the cross on the bottom of the cube instead on top. Thus saves the need of flipping the cube upside down during the solving which saves valuable time, and allows much faster shifting to the next step. Solving the cross on the bottom will also allow looking ahead for the next step, which is a key principle in speedcubing. It is ok to keep solving the cross on top, however I highly recommended starting to practice solving it on the bottom already.Solving the cross on the bottom won't be natural at the beginning, mostly due to the fact that you don't see the being solved pieces. Another con of solving the cross on the bottom is that it's harder to realize you'd misplaced one of the pieces, which will cost valuable time and setback in resolving the cube.
Just keep practicing solving the cross on the bottom. It will take longer than solving it on top in the beginning, however after some practicing it will become much easier and worthwhile. Don't afraid to look at the bottom of the cube during your solving at the beginning, after some practice you'll be able to avoid this habit.
Choosing a color: Most of the speedcubers chooses white as the color to start with and solve the cross on. Choosing a color and sticking to it is important, as you will get to know this color-scheme by heart, and get faster recognition for the pieces to solve in next steps (mostly in the F2L).
Solving the cross is based on intuitive moves only, no algorithms required. These examples cover all possible edge positions:
R2
u' R u

R u R' u'
F2L
The second step is about completely solving the first 2 layers (a.k.a F2L). This step is parallel to steps 2-3 in the beginner's method. F2L is a very important step of the speedsolving, where most of the time improvement occurs, at all levels, thanks to the huge reward for looking ahead and good cubing techniques (e.g. no cube rotations), which can lead to lightning fast solving even not for the fastest hands.8 pieces needed to be solved in this step: the 4 of the first layer corner pieces, and the 4 middle-layer edge pieces. The way to solve this step is by pairing a matching corner & edge piece, and solving them together to their slot, making this step about solving 4 pair-pieces.
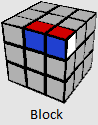

Block- a paired up corner & edge pieces I call a Block.
Solving the F2L should be done intuitively, with no use of algorithms. It can take some time to fully understand and master all the possible variations for this step, however it is very rewarding!
There are 41 possible variations of different corner-edge positions (not including the already solved edge-corner variation), however most of them are very similar, as they are mirrors of each other.
Most of the possible 41 variations solving will end in one of the 2 following options to insert a corner & edge block to its slot:
U' F' U F
F' U' F
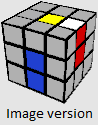
In the first variation you can see that the edge and corner pieces are already paired up to a block, and only have to be inserted to the slot.
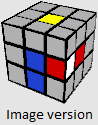
In the second variation, the corner and edge pieces are not matched to a block yet, however during the insertion to the slot they are being paired. Even that they are not already paired – the number of moves required to solve them is similar to a paired block. That’s way this position will be considered just liked as a paired block. You could easily recognize this position by 2 signals: 1) the color you chose to start with (color of the cross & first layer) on the corner piece is facing to one of the sides (i.e. and not facing up, on the U face). 2) The colors on the edge piece are in inverse position to the similar colors on the corner (as you can see on the animation above: the blue sticker on the edge piece is on the R face, while the blue sticker on the corner piece in on the U face (instead of being in one of the side faces like L / F / B/ R). Same goes for the red sticker- one is up while the other one is on the side). After some practice you'll recognize that without even thinking about it.
The way to approach and solve each of the possible 41 variations is divided into 2 stages:
- Bringing the corner & edge pieces to one of the 2 solving positions shown above (blocked pieces, or being blocked while inserting)
- Solving the variation by inserting the edge-corner block to its slot.
F2L algorithms page (covering all 41 possible variations)
Basically, all you have to learn in this step is to intuitively do the first stage, meaning bringing the corner & edge pieces to one of the solving positions and working form there. Since most of the variations are very similar (mirrors), doing that is very similar in all variations. The best way to understand that is by slowly following all the solving algs for the different variations until you get it. I explain everything in the examples below:
Case Example 1
Trigger the animation and see how it is done. The way to do it is by moving the corner to the right (to the R-B-U faces) by doing U', and then making an R turn, that way we will be able to make a U' turn and move the edge piece to the desired location, without moving the corner along with it, and without affecting any of the already solved cross pieces and other 3 slots. Then we'll return the corner back to the Upper face by doing R'. That's it, the edge and corner are ready to be inserted to the slot using the second solving position (execute U F' U' F to finish inserting)
Note that also the following variations use the exact same technique: #10, #13, #15, #16 (#10 is exactly the same situation- just in a mirror view; #13: the only difference is that we have to "move" the edge piece at the beginning 2 places to the left, to reach the L-U faces- Only difference is U2 instead of U')
Case Example 2
The way to do it is by "moving" the edge piece one place right, to the R-U faces. For that we'll use the exact same technique as the previous position: We'll move the corner to the R-B-U faces by doing U', and then make an R turn (taking the corner piece down, so it won't be affected by the U turn of the next move), then we'll do the U turn to reposition the edge piece where we want it, and make an R' turn to get the corner back up. Now the corner and edge pieces are completely paired and forms a block, all that left is to insert them into the slot by executing the first solving variation (U2 R U' R').
Note that also the following variations use the exact same technique: #4, #5, and #6.
Case Example 3
Lucky us, it's done simultaneously: We'll turn the U face until the edge piece side color will fit the center piece below it (In our case this is red, and requires a single U turn), then we'll make an R turn so the edge piece goes temporary to the middle layer. Now, we'll make a U2' turn to place the corner on top of the edge piece (Pay attention: we have just paired them and created the block), and return the edge-corner block to the Upper face by doing R'. Interesting thing is that while returning the edge piece to the top we used it to both pair the piece and flip the corner. Now the block is ready to be solved to the slot by executing the first solving variation (U R U' R')
Note that also the following variations use the exact same technique: #20, #21 and #22.
In variations where the corner or edge piece (or both of them) is inside the slot, usually the approach is to get the piece out of the slot back to the U face, adjust the corner-edge pieces to one of the solving positions, and insert them into the slot correctly. Usually, we will try to eject the edge/corner piece to the U face in a way that the other piece of the pair will already be correctly positioned to fit one of the solving position.
Now, take your time and learn how all the different variations of the F2L are being solved. Focus on understanding how it is done rather than learning the "algorithms". The bolded algorithms are the one that I use in my solving (the one that I find the easiest/most comfortable for me to execute).
In this step I focused on learning the basics of F2L, however the F2L is the step with the biggest potential for time reduce and improvement, with lots of advanced techniques which I show in the Advance F2L page:
- Minimizing cube rotations (re-gripping)
- Maximizing looking ahead.
- Taking advantage of empty slots
- Multi-slotting
- Special cases & tricks
OLL
The third step of the solution is Orientation of Last Layer (a.k.a OLL). Orienting the last layer includes 8 pieces: 4 Corners & 4 edges, all to be solved in 1 algorithm (or 2 – for 2 look OLL). The permutation of the edge & corner pieces in this step does not matter and they will be addressed in the next step.There are 57 different possible variations (or combinations) of the last layer pieces orientations (Not including the fully solved variation). Therefore there are 57 different algorithms to learn to fully master the 1 look OLL. However, since it is a lot to learn, the best way to start is with the 2 Look OLL:
2 Look OLL
2 look OLL means solving the OLL within 2 algorithms (2 looks). The 2 look OLL requires knowing only 10 algorithms, which some of them you should already know from the Rubik's cube beginner's method. Here is how it goes:- Orienting the LL edge pieces: There are only 3 algorithms necessary here:


F R U R' U' F'
f R U R' U' f'
[F R U R' U' F'] [f R U R' U' f']
- When 2 opposite edges are oriented: Use the T orientation algorithm. All edges will become oriented.
- When 2 adjacent edges are oriented: Use the P orientation algorithm. All edges will become oriented.
- When no edges are oriented: This algorithm is the combination of the first two algorithms executed one after the second (T+P). All edges will become oriented.
- Orienting the LL corner pieces: There are only 7 possible variations of corner orientations when all the edges are already oriented. All 7 cases and their algorithms are in the first table of the OLL Algorithms page.
1 Look OLL
1 look OLL or Full OLL means solving all the possible variations and orienting the last layer within 1 algorithm. The OLL step is the "least rewarding" step in a matter of learning algorithms, meaning that the transition from 2 look OLL to 1 look OLL requires additional 47 algorithms- yet rewards in "only" around 2-4 seconds. Full OLL becomes more relevant in sub 20 second solving and under. Keep in mind that the PLL algorithms (4th step) are more important and it is better to fully learn them (21 total) before going for the full OLL. Fast OLL solving is a matter of knowing the algorithms, and fast fingertricks. Though it is important to work on your fast execution of these algs, most of the progress and time-reducing will happen in the F2L (Such practice will improve your turning speed which will make also your OLL faster).Recognition
The algorithms are divided into sub-groups based on the shape they form on the U face (e.g. P shapes, T shapes and lightning bolts shapes), which makes it much easier to quickly recognize the variation and execute the right algorithm.There is absolutely no need to try and learn them all in once, just quickly review them and overview the different shapes and how to identify them. It is advised to learn a new algorithm once a day or so (depends how much time you spend solving the Rubik's cube a day:) ). Make sure that you start with the 10 algorithms required for the 2 look OLL, only then progress to the rest. After learning the 2 look OLL algs, I would recommend just trying different algs and start with those easier for you to execute. You can continue and start learning the last step (PLL) while still learning the 2 Look OLL algorithms (you still can solve the OLL with up to 5 looks using the beginner's method you already know)
PLL
The fourth and last step is Permutation of Last Layer (a.k.a PLL). There are 21 possible unsolved variations for permuting the last layer pieces (total of 4 edge & 4 corner pieces), which require learning 21 different algorithms. The good news is that you already know 2 of them (which used in the beginners methods step 7).2 Look PLL
Compared to the OLL step, there are much less algorithms to learn. However just like the OLL, you could use 2 look PLL, and solve the Rubik's cube within 2 algorithms. Doing that will require knowing only 6 algorithms out of the 21 (which the 2 algs you already know are part of them). I cannot stress enough how important it is to continue and learn the full PLL, and use the 2 look PLL only as a temporary solution. Recognizing time can be longer than the execution, and it's done twice- which leads to x2 slower PLL solving time rather than the full PLL. Besides, most of the algorithms are relatively very easy and "finger-friendly".Doing the 2 look PLL done in 2 stages:
- Permuting the 4 corner pieces:
You need to know 2 algorithms for this stage: the Aa-perm & the E-perm (you can use any of the Y / N / V permutations here instead of the E-perm, however I found the E-perm easiest to do)
l' U R' D2 R U' R' D2 R2
x' [R U' R' D] [R U R' D'] [R U R' D] [R U' R' D']
How it is done:
Look for 2 adjacent correctly permuted corners, meaning 2 corners that are permuted correctly in relation to each other. The best way to recognize it is by looking for two similar stickers on corner pieces in a single side face (F / R / B / L faces) - what called headlights. In the Aa-perm image above you can see that the 2 corners at the Back face are right corners (see the blue headlights?). If on a given side face the 2 corner stickers show different colors – then the corners are not correctly permuted in relation to each other. Now:
- If you found 2 adjacent right corners: rotate the cube (or better- make a U turn) so both corners will be on the B face, at the back of the cube. Then execute the Aa-perm algorithm. Once executed, all 4 corners will be correctly permuted. - If you found no adjacent right corners: Execute the E-perm. The angle of executing does not matter here. Once executed, all 4 corners will be correctly permuted. -
Permuting the 4 edge pieces:
Once all the corner pieces are correctly permuted, there are only 4 possible variations for permuting the last layer edge pieces (and by that solving the Rubik's cube completely): Ua-perm, Ub-perm, Z-perm & H-perm:

Ua Perm
[R U' R] U R U R U' R' U' R2
Ub Perm
R2 U R U R' U' R' U' R' U R'

Z Perm
M2 U M2 U M' U2 M2 U2 M' U2
H Perm
M2 U M2 U2 M2 U M2
Just follow the suitable algorithm for the variation you have. By executing this algorithm you had completely solved the Rubik's cube.
Recognition
Recognizing the suitable variation and applying the right algorithm is a bit trickier than in the OLL step, since there are no clues on the U face (it's already oriented). Figuring the right algorithm to apply is based on the colors/stickers to the side of the last layer, mainly by recognizing color bars, headlights and blocks. However, once you get it right, you'll be able to figure out the right algorithm in an inch of a second.Congratulations! You know now how to speedsolve the Rubik's cube! Using the CFOP method you'll be able after some practice to make lightning fast solving! The next step for you will be by order: to intuitively master the F2L, know the Full PLL and 2 look OLL, and finally go for the full OLL too. Furthermore, I'll advice you to read my advanced pages for all the steps with more advanced techniques and speedcubing tips for faster solving. Remember that the key factors for fast solving are: looking ahead, good algorithms, efficient solving and fast turning.
That’s it! I hope you enjoyed my speedsolving solution. You are invited to leave a comment in our facebook page telling about your experience with speedsolving the Rubik's cube.